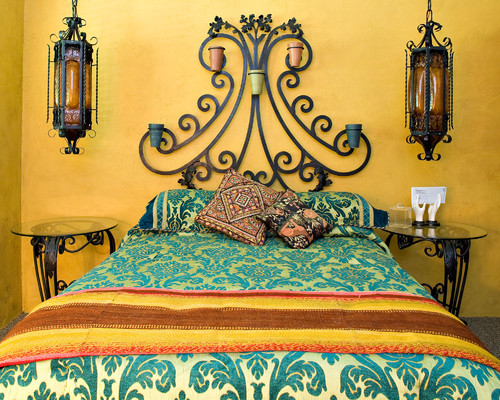
Thursday 6 December 2012

Ikat

Ikat

Image Source: Click Here
Ikat is the method of weaving that uses a resist dyeing process used to pattern textiles that is almost similar as tie & dye method either on the Warp or Weft fibers. Image below is to make you understand what warp and weft fibers are.


Image Source: Click Here

Origin:  'Ikat' is an Indonesian word which means 'to bind' or 'to dye'. origin of this weaving technique is unknown. It probably developed in several different locations independently but is practiced across the globe.

Image Source: Click Here

Style: Depending on the resist dying technique on warp and weft fibers, there are mainly three types of Ikat
Warp Ikat: Ikat created by dyeing the warp are the simplest form of Ikat. First the yarn bundles are tied on warped strings of the loom. Then the bundles are covered with wax or wrapped tightly with thread or some other dye-resistant material- to prevent unwanted dye permeation. The resist dye procedure is repeated until the desired result is achieved. 
Koyalagudum, Andra Pradesh specialize in warp ikat particularly suitable for furnishing fabrics made from cotton. 

Image Source: Click Here
One can see the pattern on warp even before weaving. Refer the image below.

Image Source: Click Here

Weft Ikat: Weft ikat uses resist dyeing for the weft fiber. This type of ikat is very difficult to weave. Weft ikat are commonly employed where pattern precision is of less aesthetic concern than the overall resultant fabric. Pattern is visible only after weaving.

Image Source: Click Here
Double Ikat: Both warp and weft are tie-dyed in this kind of ikat. This form of weaving requires lots of skill for right patterns to be woven and is believed the best form of ikat. The amount of labour (A sari length takes two men seven months to complete) and skill required also make it the most expensive. Gujarat, in northern India is home of one of the most famous ikat traditions called the Patan Patola. These silk fabrics are double ikat, traditionally done with vegetable dyes, but now using chemical dyes. The complexity of having both the warp and weft resist dyed makes the actual weaving much more demanding of precision. The intersection of these threads must be precise or the design is lost. 
Process: Bindings, which resist dye penetration, are applied to the threads in the desired patterns and the threads are dyed. Great care must be taken in tying resist areas with water repellent material such as bicycle inner tubes cut into strips. Alteration of the bindings and the dyeing of more than one color produce elaborate, multicolored patterns. When all of the dyeing is finished the bindings are removed and the threads are ready to be woven into cloth. Designs generally are worked out on graph paper. Great care must be taken in putting the warp on the loom, keeping all the threads in position is necessary for the design to work. The natural movement during weaving gives ikat designs a feathered edge which characterize this technique. Some styles of ikat favor a blurred appearance.

IndiaJapan and many South-East Asian nations such as CambodiaMyanmarPhilippines and Thailand are famous for their ikat production.

Ikat fabric is timeless and is used in many forms from furnishing to clothing. I also love ikat fabric for its feathered edge designs. Do you have something in ikat at your home lets share with us here at my Facbook page. I would love to look at those eye candy.

Wednesday 5 December 2012

Christmas in the Great Room

Welcome to our holiday great room (but please excuse the crazy lighting):


Come on in ... have a peek around.


Go grab some egg nog and have a seat (I even turned the wing chairs around to face the sofa for a better conversation area):


Feel free to toss our holiday pillows from Pottery Barn aside so that you can get comfy: 


That goes for this festive pillow (from Wal-Mart), too ...


I hope Buck, our guest of honor to our mantelscape, appreciates that I mixed in faux shed antlers to our coffee table centerpiece:


Hmmmm ... think I should add a little ornament or two to our Charlie Brown tree?


As for our *main* tree ... this year, I decided not to wrap it with mesh, but, instead weaved red, gold and green glittery garland throughout it.  I also decided to add more pops of white:


What didn't change (and, I doubt, ever will) is my love for crazy toppers!


These fun oversized snowflakes from New River Pottery are the perfect solution for adding more white to our tree:


As are these cute sparkly fellas (also from New River Pottery):


Don't you just love the nighttime glow?   


Now, it's your turn!  I'm off to visit your amazing holiday homes!

I'm joining:

Savvy Southern Style/WUW
At the Picket Fence/Inspiration Friday
Jennifer Rizzo/Holiday Housewalk Party
Housepitality Designs/Better Late Than Never Christmas Inspiration Linky Party
post signature

Tuesday 4 December 2012

My Take on A MacKenzie Childs Tree


I am thankful to be blog friends with Patti over at Pandora's Box.
She actually lives close to MacKenzie Childs farm and has even worked in their store this past year! Oh what a dream! Patti shared with me the actual tree that they had decorated in the store last year...


I think it is just 2-die-4 wonderful and whimsical. So this year I thought I would work even harder to replicate it than I

Sunday 2 December 2012

If Furniture Could Talk ...

I'm pretty sure if our furniture and accessories could talk, they'd have quite the stories to tell ... especially around the holidays.
 
 
They'd share how they watch in amusement each year at the *pained* look on my face as I stare at them (while pacing, stopping only to tilt my head back and forth and scratch my head), wondering how I'll decorate them *this* year:
 
 
An *every day* piece would share its delight as Mr. Reindeer moved on in for the holidays:
 
 
This small white pitcher would tell you how it laughed (and grimmaced, just a bit) as I gently *shoved* holiday greenery, berries and light up branches down into it:


Our otherwise plain lantern would tell you how it loves the new *hat* I concocted, made of greenery, ornaments and glittery garland:


A bowl once filled with seashells would share its excitement with you as it welcomed holiday ornaments, pinecones and snowflakes:
 
 
Annnnd, I'm positive our mirror would tell you it had *nooo* what was going on when I unexpectedly covered it in Christmas cards from years gone by (especially since I usually put them on one of our Christmas trees). 


"We Say Merry Christmas" and more greenery seemed only fitting to place above everyone sharing their holiday cheer!


But, before we know it, those pieces will be empty again after the holidays ... they'll see that same pained expression on my face as I wonder "what next?"  For now, I hope that they continue to enjoy the holiday merriment that has been added:
 
 
So, tell me ... what would *your* furniture and accessories say if they could talk?

Come on over and play at:

Savvy Southern Style/Holiday Vignettes and Mantels Party


post signature

EAT Tray!


Such a fun piece.

This was an easy transformation. I took an old wooden tray with folding legs, placed vinyl letters on the top, then using Annie Sloan French Linen, just painted the top and sides of the tray.


After the paint dried, I removed the vinyl letters to reveal the wood beneath and did a little distressing. I sealed it and now it's a fun and functional piece.


Legs up or down!

Friday 30 November 2012

Joke's On Me!

This year, I wanted to keep our Christmas mantel simple.  Ha Ha ... *who* am I kidding?!
 
Meet our new buddy, "Buck."  He's the reason my thoughts of simplicity went right out the Christmas window!  He's a Virgo ... likes long walks through the snow covered forest ... annnd, if you stare at him long enough, you'll swear that he has winked at you!  The moment I spotted him at "New River Pottery" (an a-MAZING Christmas shop in Wilmington, NC), I knew I just had to have him as our holiday mantel guest of honor.

And, to properly welcome him to the family, I saw it only fitting to splash a few lights and ornaments to the wreath that came with him.  From there ... it only got worse!  Ornaments began to hang themselves from the top of the mantel:


A big, lush garland arrived on the scene ... only for me to add lots of ornaments, glittery garland and snowflakes:


Prelit topiary trees made their way to the mantel, too, but not before I placed them in cream urns I had on hand, along with *more* ornaments:


And, hmmmm ... where did Santa 1 and Santa 2 come from?  I must've purchased them while in one of my *Christmas comas* at HomeGoods!


And, after all of that I had to "believe" that I was done!


Needless to say ... somehow this ALLL came together to create this:


Not exactly *simple,* but we'll take it ...


And, while I know our sled would much rather be used to fly us down a snowy hill (that does NOT exist here in Myrtle Beach), I gave it no choice but to be dressed with winter greenery and faux skates and placed by the fireplace:


So much for a simple Christmas mantel, right?  I s'pose the only missing now is a warm fire ... next time!


So, please tell me ... do you always start out with one decorating plan and end up doing the exact opposite?
 
I'm joining up with:

Savvy Southern Style/Vignettes and Mantel Party
The Lettered Cottage/Christmas Mantel Party
52 Mantels/Christmas Link Party
Becca