Tuesday, 10 May 2011

It's Official ... I'm a Stripper !!

Yes, folks, "Boom Boom Becca" has hit the stage, I mean dining room, and stripped the table top.  Woo Hoo !!

And, when I asked my husband to please come and take my picture because I was about to start stripping, I thought he was going to break his legs racing to the dining room!  Imagine his sheer disappointment, when he found me waiting for him, looking like this ... can you say *sex-ay* ?!  NOT (lol).


All I can say is I'm soooo glad I did this !!  This table is part of the set that my sister gave me when we moved into our home five years ago.  I love the set ... it just needed a little TLC, which I was afraid to do before now. 

BEFORE:  Cherry table ... quite a few dings in it:


AFTER:  Now dark walnut, which matches the sideboard much better!  (This picture is right after the 3rd coat of polycrylic ... not done yet).


It's FAR from perfect, but it'll do!  I simply stripped the top with Citristrip ... sanded with my palm sander ... coated with three coats of MinWax Dark Walnut ... and topped it off with a few coats of Polycrylic.  If I had to do it again, I would've heavily sanded after applying and removing the Citristrip.  Being my first time, I was afraid I'd gouge or truly ruin the table.  I'll know better next time, fo' sho' !!

I also painted the bases BM White Dove ... annnnd, of course, that meant I then had to distress, glaze and wax them to match the chairs:


The dining room is just about ready for its reveal !!

Thanks for stopping by,

*Boom Boom*

Sunday, 1 May 2011

Nothing is Safe ...

... from my paintbrush !! 

I'll bet you're SHOCKED that I've been dipping in the paint/glaze/stain cans again, aren't ya'  ?!  The latest victims have been the dining room chairs that one of my sweet sisters, Mitch, gave to us when we moved into our home.   Her husband and she bought a new set for themselves and passed these on to us.

BEFORE ... traditional cherry:


AFTER ... French-y FUN:


I think distressing has become my favorite part:


I also recovered all of the cushions with a soft *taupe-y gold-ish* durable fabric.  Just a few more chairs to go, and I'll be ready to show you the dining room's *new* look!


I hope my sister approves of the change!


Well, I'm putting the paintbrush down (for now) to enjoy this soon-to-be gorgeous day with my fellas !!

Thanks for stopping by ... I'm off to play at these following awesome blogs:

Dittle Dattle/Amaze Me Monday
BNOTP/Metamorphosis Monday
Savvy Southern Style/WUW
Elements Interiors/Whassup Wednesday
Finding Fabulous/Frugalicious Friday
Becca

Friday, 29 April 2011

Barefoot at Havelock, Andamans

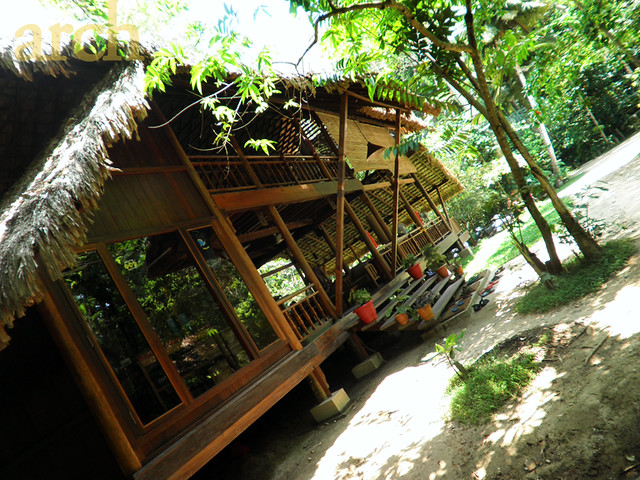
...is an eco-friendly resort in Havelock Islands in Andamans tucked away behind the tropical tree fence on Radhanagar beach.
barefoot1
Having read some great reviews online we decided on this place for our summer holidays and it surely was worth it.
beach2
Pristine, unspoilt beach with aqua waters and surrounded by lush tropical foliage it is a treat for city dwellers.
barefoot4
All the structures at the resort are constructed using locally sourced natural materials. The reception area...
barefoot6
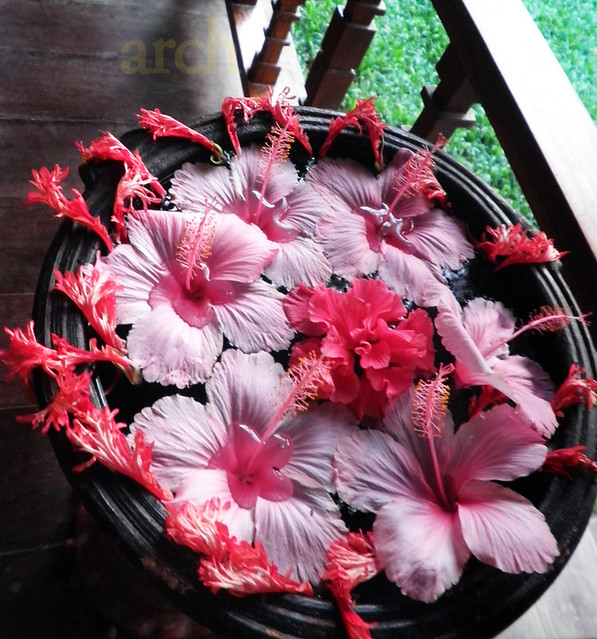
A vibrant arrangement of tropical flowers floating at the reception area gives us a small peek into the amazing things to be experienced during our stay...
barefoot3
The Nicobari-styled dining area completely engulfed by lush foliage...
barefoot8
Exotic tropical flowers...
barefoot11
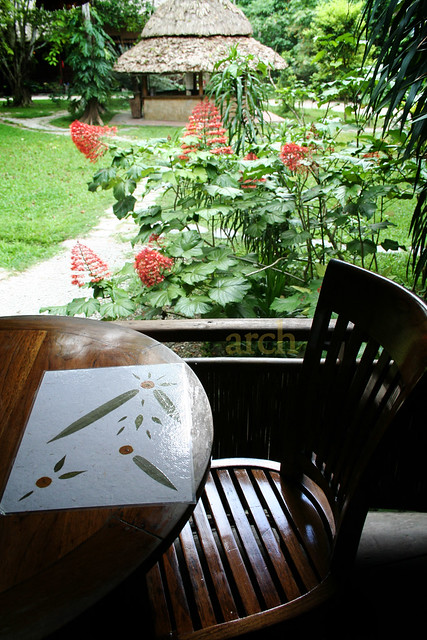
We enjoyed the airy dining area with a great view....
barefoot12
Eco-friendly-ness is evident in every aspect of the hospitality experience, the place-mats are made of handmade paper and dried flora.
barefoot7
The low dining arrangement was out favourite during our evening chai sessions, listening to the sound of waves on a high-tide, the changing shades of sky and excitedly watching fireflies at dusk...
barefoot5
The sandy path scattered with dries leaves of various shapes and colours lead you to the various cottages...
barefoot9
What a practical way to keep the sand off your cottage, just wash your feet and enter 'bare feet' into your room...
barefoot9
Sit outside and enjoy the sounds of the tropics, the intoxicating symphony played by the crickets, chirping birds and croaking frogs.
barefoot10
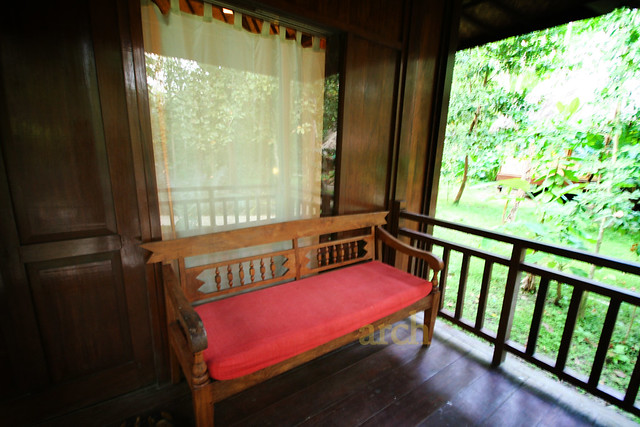
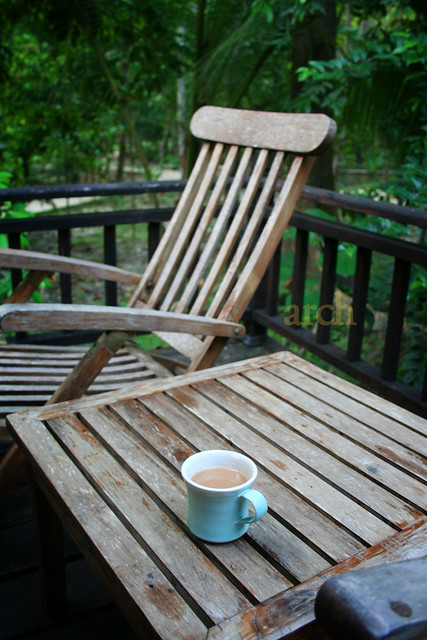
Our place on the deck for many cups of tea...
halla
...and hours of reading.
room
The interiors of our cottage, antique four poster bed with mosquito nets, which the housekeeping staff would spread out in the evenings...

What a memorable experience of being surrounded by nature's best elements....

Will be doing a post on our travel experience soon on Rang~ The Colours of Life.

( Images by Arch)

Thursday, 28 April 2011

New Found Love: Canopy bed

This is my very fresh n new found love...n after watching these pictures for hours... I am dying to have one. They add luxury to bedroom...... here not only bed, a vase standing proudly near the bed is also to die for.


Image Source: Click Here
There's no full stop on my day dreaming. Amazing pictures of amazing canopy beds...unique in style.
white white white ...how do ppl manage with this color


Image Source: Click here
 

Image Source: Click Here

Now if I can't manage imagine whites....here is the color...so refreshing and vibrant.

Image Source: Click Here
What about having one outdoor canopy bed.... have a look...
Image Source: Click here


 Enough for the day I think ....lets see what will be the next new found love of mine...keep visiting this space for some good ideas and some day dreaming :-)))


Wednesday, 27 April 2011

Vastu Gyan: Introduction

Vastu Gyan (Knowledge Of Vastu) is a new series that I am adding to my blog for all my blog readers out there. This series is my endeavour to make Vastu bit simpler than what its in present days. Many fake experts and those having half cooked knowledge have made it a business to dupe the gullible masses. Deep study of the teachings of Vastu Shastra has therefore become very important and relevant today. Besides design & decor knowledge of Vastu is also very important to transform our home into a peaceful place.


Our life is sensitive to not only the ambience around but also the structure and design of residence we live in.The science that deals with the knowledge of architecture, interior and exterior design of residence is known as Vastu Shastra. There is no point if someone believes in this ancient science or not, there are lot of examples are present around us, many of the ancient temples, monuments built according to vastu shastra are still existing and standing tall against all odds.
According to 'Vrahad Vastumala' - a scripture of Vastu Shastra says-
" House(Home) is that which offers the worldly joys of having a family, keeping pets, cattle, etc; which protects from cold, heat, storms and other external hazards and which facilitates the proper performance of dharma (righteous duties), artha (attainment of wealth/material power and progress) and kama (fulfillment of desires).

Read more about Vastu:
Foyer/Entryway Vastu
Living Room Vastu
Dining Room Vastu
Kitchen Vastu
Master Bedroom Vastu
Guest Bedroom Vastu


Saturday, 23 April 2011

A Mini-Bench Facelift!

Happy Easter, everyone !!  I hope that you all are enjoying a wonderful holiday weekend with your family and friends.

As for me ... my adventures with painting continue!  In fact, I decided to get into some glazing/staining.  Thanks to all of your creative projects and fantastic tutorials, I decided to go for it!  Jill @ Peanut Butter Plaza, who has created several beautiful pieces explained how she mixes clear glaze with stain, which allows you to "play" with the stain a bit longer on the furniture.  I'm sure many of you do this, too ... I like this idea because the stain doesn't set in as fast.

Sooo, I sanded, primed and painted (two coats of BM White Dove) the bench and then let it sit for a few days.  Next came distressing ... roughing it up with 80 grit sandpaper here and there and then wiping the entire bench down with a tack cloth to remove the sanding dust.  I then mixed the clear glaze (by Valspar) and stain (Minwax Dark Walnut) together, adding a little more of each, until I was satisfied with the color.  Then it was the moment of truth ... I slapped the mix on with an inexpensive paintbrush, waited just a bit and wiped it off with old t-shirts.  What fun!

BEFORE:

 
And, here is AFTER:


What I really like about distressing is that there isn't a right or a wrong way to do it!  Just sand wherever you want!


I love how much character the glaze adds to the places I distressed:


Even sanding the metal sides here and there was easy.  (I also recovered the cushion with leftover burlap.)


Needless to say, I'm now hooked on glazing!  And, knowing how my OCD is on the rage, it looks like the fun didn't stop on the little bench (lol) ... 

 Stay tuned !!

And, HAPPY EASTER !!

Linking up with:

Dittle Dattle/Amaze Me Monday
BNOTP/Metamorphosis Monday
Centsational Girl/Paint Projects
My Uncommon Slice of Suburbia/Tuesday's Treasures
The Lettered Cottage/How To's Party
Savvy Southern Style/WUW
Elements Interiors/Whassup Wednesday
Miss Mustard Seed/Furniture Feature Friday

Becca

Monday, 18 April 2011

The *Long-Winded* Story of a Sign ...


Once upon a decorating-time, there was this crazy lady who woke up one day and decided to attempt a Pottery Barn-ish makeover to her traditional sitting room.  Her plan included switching out furniture, smothering said furniture with white slipcovers and pouring paint on her bookcase and mirror.  She also knew that she wanted a simple sign above the bookcase to finish it off.  Of course, this sign was nowhere to be found at her usual haunts.  Bummed, but not giving up, she forged ahead. 

As she was prepping her room to paint the bookcase, she had to slide the bookcase out from the wall.  Lo and behold, a *gabillion* (yes, a gabillion) holiday signs came crashing down from behind the bookcase (and, yes, said crazy lady hides holiday signs, as well as prints that currently aren't being used, behind there ... she *knows* some of you do that, too, so please don't judge).  The one sign that came crashing on her foot (literally), came with a subliminal message that said "paint me ... paint me!"  Yes, folks, this "Happy Holidays" sign became the sacrificial lamb to crazy lady's attempt at making a sign in something other than white chalk ink removeable markers.  There she is, in all her glory, from last Christmas:


She studied tutorials in blogland; however, most of them included fancy Silhouette machines, which she doesn't have ... (yet).  And, then, she found a tutorial that might actually work!

So, she sat down at her computer and typed the simple word she wanted: GATHER.  She then selected a font (Cambria) and font size (400) and printed away.  She then cut out the letters and set them aside.


Next, she cleared off her kitchen island, gently laid the holiday sign on painter's construction paper and then surrounded it with sandpaper, leftover paints in shades of grey, blue and white, along with used paintbrushes. Together, they then said the official decorating prayer, which is "please let this work!"

Then, the fun began.  She slapped a coat of white on the wood and allowed it to dry.  Then came layers of two different blues, grey and finally, dry brushed a coat of white again (in a fancy "v" pattern she might add). 

Then, came the hard part ... lining up the letters on the newly painted wood.  She channeled energy from all of you crafty folks and traced away with her son's Spiderman pencil ... HOPING that the letters were even and aligned properly.

Once that was done, she turned to her black chalkboard paint (as that was the only paint in her stash).  She was a bit worried, though, that the chalkboard paint might not like being sanded down after it dried ... thought it might smear or rub off too much.  She was willing to take the chance ... all in the name of decorating!

Once it dried, she held her breath and sanded away.  It was actually working!  It wasn't smearing ... it was removing pieces of the black paint and the various spots she was sanding.  Yippee! 


Her little block of sandpaper started hitting places all over the wood, not only revealing the layers of grey and blue, but also the dark paint that once used to cover it.  Woo Hoo!


Finally, the crazy lady stepped away from her new creation ... blew the black sandpaper off of her hands (and off of her face and hair) and cracked a cheezy smile!  Despite her steady hand skills in need of help ... despite one letter being lower than the others ... and despite it not being perfect, it.was.done!  And, the best part is that this project was FREEEE!!!!  The only cost being blood, sweat and tears (and, okay, maybe a manicure)!


And, here she is today, mounted in all of her imperfect glory:


Lesson learned and passing along ... go grab a piece of wood that you aren't using and make a sign for your home (oh, and to invest in a Silhouette machine) lol !!

Have a great day and thanks for hanging in for her story!

Becca

Linking up to:

Dittle Dattle/Amaze Me Monday 
Boogieboard Cottage/Masterpiece Monday
The Stories of A to Z/Tutorial & Tips Tuesday
My Uncommon Slice of Suburbia/Tuesday's Treasures