Tuesday, 12 March 2013

Flowers Are Blooming in the Kitchen!

I truly canNOT believe that we're only a few weeks away from Easter!!  Weren't we just sharing our Christmas decorations?

Don't get me wrong ... was I sad to have replaced our white "Christmas-turned-Valentine" tree with something a bit smaller?  Nope!


Was I bummed when I "borrowed" our silver bucket filled with branches from our sitting room and filled it with faux dogwoods to help create our Easter tree?  No way!


Was I more than glad to dust off our Spring bin ... unwrap the sweet ornaments gathered from my favorite "haunts," such as HomeGoods and Pier One(?), along with ...


scatter extra eggs at the base of the branches?  You betcha!


Was I happy to have spotted these cute "EASTER" blocks at Home Goods last month, knowing that they'd be a great, inexpensive addition to a Spring vignette?  You *know* I was!


And, I'll give you one guess if I enjoyed pulling these cuties out of their hiding spot in our bookcase cabinet to let them welcome Spring!


This little cutie (from Pier One) was more than ready to hop on out of the cabinet, too:


Yes, looking through the branches, you can spy Spring vignettes scattered here and there!


Can you tell I'm MORE than ready for Spring?!  Now, if it would just GET here!


While I patiently wait for its arrival, I'll enjoy visiting all of your Easter/Spring goodies!

Thanks for stopping by, sweet friends!

I'll meet you over here:

My Uncommon Slice of Suburbia/Tuesday's Treasures
A Stroll Thru Life/Tabletop Tuesday
Our Home Away From Home/Tuesdays At Our Home
Savvy Southern Style/WUW
Fox Hollow Cottage/Hop to It Spring Thing Link Party
Setting for Four/Project Inspired Linky Party
post signature

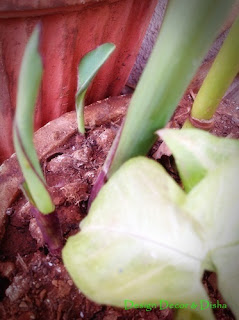
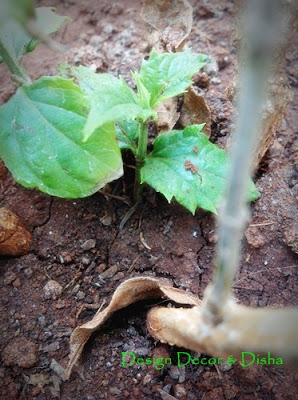
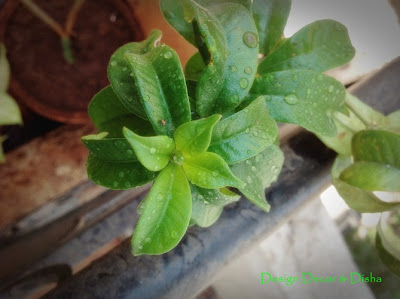
Spring Is Showing Up In My Garden

 Spring is nature's way of saying let's party - Robin Williams
Yes I have reason to party, we completed two blissful years in our abode and I am happy that my garden too is showing up that sign of partying.
Having somewhere to go is Home, having someone to love is Family, having both is Blessing. Ever since we moved to our haven we feel blessed, content and happy :)
Here's how my garden is smiling with me and showing sign of spring..............


Monday, 11 March 2013

While I patiently wait for Spring...

Yesterday we set our clock ahead by an hour.
The days are getting longer.
As I look outside my window I see a white blanket of snow which doesn't seem fluffy any more.
Tiny rivulets flow down the paths.
A gently breeze seems to take over the quiet stillness of winter.
A season in transition.
An anticipation of Spring....

Having moved to Minnesota in late July last year, we have been able to enjoy Summer, Fall and Winter.
Now as I patiently wait for Spring outside my window, few corners at home seemed to have already welcomed the season:-)


 Vintage Oleographs, fresh flowers and silverware.

A sparkly twist on the Oleographs...

 Attar perfume bottles from Old City Ahmedabad sit pretty on a vintage tile...

A floral mirror work dupatta provides the perfect background.


 Rose perfumed tea lights...


Look who just made an appearance!

Priya Sebastian's Charcoal Artwork doesn't have an orange wall backdrop but holds the same position in our study.

Wishing all of you a beautiful season of fresh flowers, soft green grass under your feet and blue blue skies!

( Images by Arch)

Paper Craft: DIY Decorative Tray

Don't miss any update from this blog like my Facebook page click here
Past few days had been very hectic and I almost forgot to do a post on a Decorative Tray that I made from Newspaper. So here is my promised post. 

1. Gather all the required material as I have shown below.


2. Cut 5-6 Inches broad strips of paper as shown below.


3. Now roll the paper strip with the help of stick. As shown in image below. Remember you have to take out the stick once paper is rolled completely. So don't roll it too loose or too tight.


4. Take the stick out slowly. Now stick the end of paper with glue as shown here. 


5. Make good amount of rolls as you will need lot of them. I made around 50-60


6. Now image for this step is missing. But believe me it's very easy. Take two rectangular card board of same size. Size depends on your choice. On one cardboard start sticking one end of paper rolls around 2 inches should be on the cardboard. Place one after the another keeping space of around 2.5-3 inches between them. Make sure that there is one roll glued on every corner of cardboard.

7. When you are done all around the edges of cardboard then glue the other cardboard of same size on top of it and let it dry.

8. Now pickup one roll and start weaving on the rolls that you glued on the cardboard earlier. Pattern should be once in then out as shown in image below. 


9. When the roll is about to finish then insert another roll inside it and keep weaving until you reach desired height.


 10. Now cut the extra length of roll and secure the end inside woven part and glue it(Refer image below). Put cloth clips on it and let it dry. After half an hour or so it's time to prime the tray.


 11. Either spray paint it or use brush. Wait for primer to dry then color it with color of your choice. Use acrylic colors and after the color is dried completely give a final coat of varnish to make it durable.


 Here is a final product my decorative tray.

https://designdecoranddisha.blogspot.in

Looks no less than wicker basket and is strong enough to hold some stuff :)

https://designdecoranddisha.blogspot.in

I keep changing stuff that tray holds. Have a look........


And my hubs liked it so much that he is taking this tray to his office and will try to be little organized :) Well that's a great reward I got.


I made some small baskets also. Have a look here.
 Do let me know how do you find it.