Showing posts with label When Creative Juices Flow. Show all posts

Thursday, 19 June 2014

DIY: Decoupage Slippers

What do you do when something is just not ready to wear out.
I have something like that with me since past eight years and it's still in good condition. The only thing is that I am super bored of its plain and dull look. It's my slippers.....yes you heard it right. Please don't laugh or make fun of me. They are really boring, have a look.......
and they are too common.
Kitschy Slippers


So what do you suggest I should do with this slippers...........
Well kitsch and decoupage was on my mind since long so why not fulfill both the desires and at the same time give new look to the extremely boring slippers. 
So here I go with some easily available supplies:

Kitschy Slippers


  • Colorful paper cuttings from Magazine
  • Scissors
  • White water based glue
  • Acrylic Medium/ Modpodge
  • Brush
  • Varnish

1. I washed it and then let it dry completely. applied acrylic medium on the surface and put paper cutting.

Kitschy Slippers

2. Then I applied acrylic medium on paper too that I pasted. Kept on doing step 1 and 2 until the surface was all covered with paper. Let it dry.

Kitschy Slippers


3. Then I mixed 1 part glue in 1 part water and applied it properly on the surface and pasted a cutting of this cute doll that I found in magazine. Let it dry.

Kitschy Slippers

Kitschy Slippers

4. After it was completely dried I gave two coats of varnish and it is almost waterproof and that's how it looks now!!

Kitschy Slippers

I am happy with the outcome. Though I don't know how long it will last but I am happy that it is not an eyesore anymore. I love wearing it :)

Kitschy Slippers

Some more clicks............

Kitschy Sippers

And finally I am done with Decoupage and Kitsch as well. How do you like this DIY. 
Do let me know which version of the slippers you liked...the earlier one or decoupage one!!

Kitschy Sippers

Wishing you happy and creative weekend. Have a great fun!!


Thursday, 22 August 2013

DIY: Sunburst Mirror

Don't miss any update from my blog, like my Facebook Page(click here)
Here is long due and promised post on Sunburst mirror tutorial. Lot of readers mailed me to know how to make this sunburst mirror, so here I'm sharing it with you all lovely and wonderful readers :)

http://designdecoranddisha.blogspot.com


Supplies:
Hardboard -2 (8 Inches diameter)
Mirror-1 (8 Inch diameter)
Skewers 32 (I used broom sticks though)
Glue gun
Embroidery mirrors in 2 sizes
Stones/sequins
Card stock
Craft glue
Scissors
Hook
Acrylic color of your choice
Paint Brush
Step 1:
Get mirror of your desired size. Stick back of the mirror to the hardboard with glue.


Step 2:
Cut the card stock diameter greater (Approx. 2 Inches) than  hardboard/mirror's diameter  Now on this card stock draw a circle with diameter 4 Inches less than mirror and cut it with paper cutter/knife. Inner circle is of no use. Keep the remaining part.


Step 3:
Paste this card stock on mirror as shown.


Step 4:
Stick sequins/stone in a way so that it is half on mirror and half on card stock.


Step 5: 
Now mark the back side of the mirror i.e. on hard board side as shown in pic. Tag every mark with B for Big Skewer. M for Medium Skewer, S for Small Skewer. If you want to keep all the skewers in same size then no need to tag them.


Step 6:
Cut the skewers in three different sizes. Small, medium & big as shown in pic.  


Step 7:
Stick all the skewers accordingly. That is big skewer on tag B, medium on M & small on S. Let it dry for at least 2 hr. Refer pic below.


Step 8:
Now stick another circular hard board on this arrangement of skewers (i.e on the back side of sunburst mirror) and fix hook on it to hang it on wall.

Step 9:
Turn the mirror side up. Now start sticking embroidery mirrors on these skewers in a manner that you like. Try different orientation  and go for the one you like most.


Step 10:
Now color all the skewers in golden color or color of your choice. Let it dry.
Sunburst mirror is ready. You can go wild with your imaginations. Try making one and let me know.


Here is my sunburst mirror that looks beautiful against my mango yellow wall


Hope you will love this and will going to try this :) Happy creating!!


Friday, 9 November 2012

Diwali Craft & Home Decor Inspiration- III

What you do with dried plants. I had a dried Basil (Tulsi) plant for quite some time and recently I gave it a new life. I turned it into a 'Jewel Tree'. Diwali is a festival when we add lot of bling to our decor and this jewel tree is looking just perfect to give any corner or nook an instant cheer.


Under this tree is standing lord Krishna playing flute and Radha is sitting mesmerized by it's melody.


Any guess what these jewels are made of. Well this jewel is not expensive one. It's ball made of aluminium foil.  I just hung some foil balls onto the branches and some balls I glued on them. Then I painted the branch in silver color and the jewel tree is ready.You can hang some colorful stones or gems also.


Now take a look of few more cheerful corners in my home. 


Check out earlier posts on Diwali inspiration here & here.

Have a very happy weekend and stay creative!!!


Thursday, 30 August 2012

Wall Makeover : Wall With Personal Touch

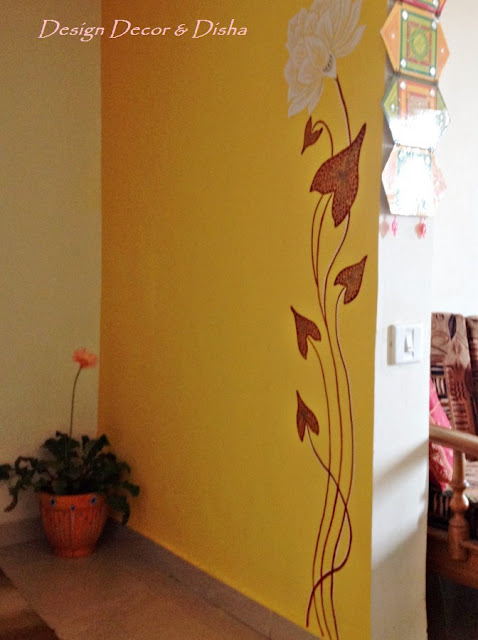
This is the very first makeover of my place that I started from foyer. Come on and first have a look at before and after of the entrance.


Wall_1

What a wonderful difference. I am totally loving it. Images are not doing justice though :-(
Now the story of this wall transformation goes like this.........

Wall_2

In my home I want everything with my personal touch or I can say everything made by or done by me. I am on way to fill colors in my home (my blank canvas) and I started from foyer. First I thought of stenciling the wall and one more idea was to draw a free hand design. So just for a rough idea I came up with these two images. Sent these pics to my sister and she gave me go ahead with freehand design.

Wall_3

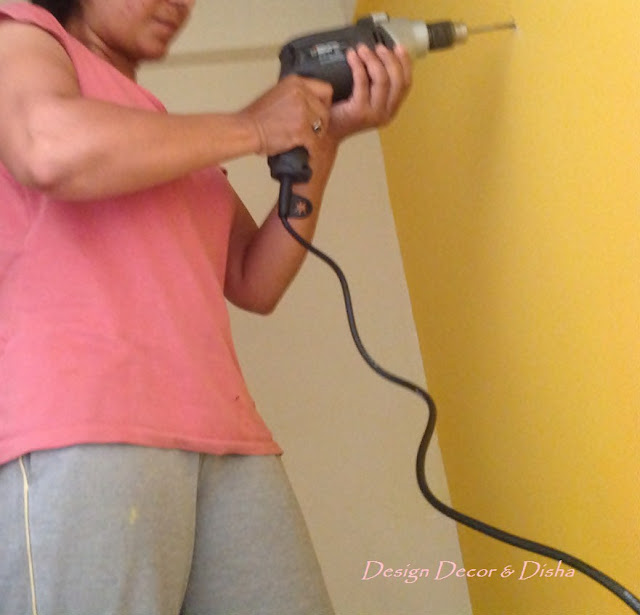
I wanted the color of wall to be bright as the entrance to my home is little cozy and dark. I chose lot of bright colors and then zeroed in on this mango yellow. My li'l one was ready to lend his helping hand for sanding, priming, painting and designing the wall. 4 Yr old and did it so well that I was just amazed to see everything he has done. Kids these days are very smart :-)

Wall_4

Then I drew freehand design on the wall and started filling brown color to it. 

Wall_5


Though it was freehand design I wanted to give it a look of stencil. For Lotus I was confused between white and red color. White looked better..........

Wall_6


Steps involve in making leaves..........

Wall_7

Here's a look after filling color but something was missing........

Wall_8


Filled golden color in leaves veins and it looked perfect.

http://designdecoranddisha.blogspot.in


 Here is the completed wall ....looking bright and beautiful.......but still something is missing......

Wall_10


Idea clicked and I'm ready with my weapons and lil' one is busy clicking progress of the work.

Wall_11


Here comes the complete look. Look that gave me full satisfaction. It turned out far more better than my imagination. And here I wanted to let all my friends know that this sunburst mirror is also my creation and I created it in only 3hrs because I was in hurry to complete this wall as soon as possible (Sometimes I become so impatient).

Wall_12


It feels great, wonderful, amazing when you see your own creations everywhere around your dwelling.

Wall_13

This wall is so me. Everything on this wall describes me. Sometimes a just sit and keep admiring the beauty of this wall....crazy me ;)

Wall

Let me know your views and ideas about this wall.
Click the link below for Sunburst mirror tutorial:
Sunburst Mirror Tutorial
Loved my blog, then probably you don't want to miss any update, Click here to like my Facebook Page!!!


Friday, 22 June 2012

When Creative Juices Flow: DIY Stained Glass Jars & Bottles

Never miss any update from my blog like my Facebook Page Click Here!!

When I moved to my new haven I carried along all the stuff that I've hoarded over the years and that I wanted to turn into treasure, like empty glass jars and bottles, cardboard boxes, cans and plastic containers :-o Then husband advised, rather ordered to give all that away to our maid and reluctantly I did it. Guess what ;-)) me being me I gave away only half of the junk and kept back rest of it for my DIY projects. 
I was pondering over at what do I do with these glass jars and bottles and googled  number of times and I found some wonderful inspirations. Then ideas started flooding in my mind and I made lot of stained glass bottles and jars and used them in every possible way. It's a good project for Diwali also. You can make lot of lanterns for Diwali and can hang then in balcony/terrace or in your garden with LED tealight inside it. Check out some more Diwali Craft Ideas click here & here.

I used it as a Vase : It looked beautiful.

http://designdecoranddisha.blogspot.com

http://designdecoranddisha.blogspot.com


 As Lanterns: 


 It looks beautiful in the night.


As a Planter: 


Grow plants like money plant or any other plant that can grow in water.


As a Pen & Brush Holder: 


Being an  artist how can you forget your brushes. They also deserve some nice place to sit in.


Tutorial

Now here's a step wise tutorial for dear readers.
1. Take an empty glass jar or bottle.
2. Wash and let it dry. You can wipe it with spirit afterwards to remove any trace of soap.
3. Take a glass painting color of your choice and paint outside of the bottle with sponge brush.
4. Let it dry for 24 hrs. Though I was impatient and waited only for 3-4 hrs.
5. Use 3D outliner to make outlines and then let it dry.
6. Fill glass colors of your choice inside the 3D outlined design. Let it dry.
7. Alternatively you can skip step 5 & 6 and can use pearl/shimmer color to directly paint on stained glass or bottle as I did in peacock feather patterned jar.

Here you go. Your Stained glass jar is ready. Imaginations and possibilities are numerous, use your creativity.

http://designdecoranddisha.blogspot.com

P.S : -
1. If your brush strokes are visible on glass jar and finishing is not good try this trick, pour small quantity of  glass color in the bottle and swirl it inside the bottle until color spreads entirely. Keep the bottle over turned on paper/towel and let it dry. Wipe off extra color from the rim.
3. You can use acrylic color also and using mod-podge you can stick object of your choice. I stuck peacock feather (refer image 2).
2.  For glossy finish and durability apply a coat of varnish on finished product and let it dry.

Hope you enjoyed this tutorial. Let me know your views and opinion.... leave your comments.
Have a wonderful weekend and stay creative.